Update from original post! Below are screenshots of better instructions.


Original Post:
First I want to say I'm a fan of Articulate and eLearning Heroes, however I'm also a fan of Captivate, and one thing that functions much better in Captivate than Articulate is Closed Captioning. With Captivate you can type in notes and click a box to make notes CC, then add a cc button to the skin/player. That simple in Articulate, not so simple.
My method gives user on/off control, uses variables to remember on/off setting from slide to slide, and does NOT involve duplicating slides/layers, which can be a maintenance nightmare and makes projects file size larger than necessary). Which is why I prefer my method over some of the other great methods that I found on Articulate eLearning Heroes (such as placing cc text boxes on timeline, placing cc text in player resources, and/or having cc button trigger to a duplicate layer with cc text.
My method involves using text boxes to display cc text when cc on and off buttons are clicked. The cc text boxes can be placed in a scrolling panel if there is a lot of text. The biggest issue I had was getting the CC to be default to
off on the initial slide. After some "playing" I was able to overcome this.
The trick is to have on the first slide only the trigger
“Change state of cctextbox to Disable when the state of ccOn is not
hidden” . However before doing so it is necessary to select the textbox
and add a Disabled state, edit the disabled state to display no text/just a
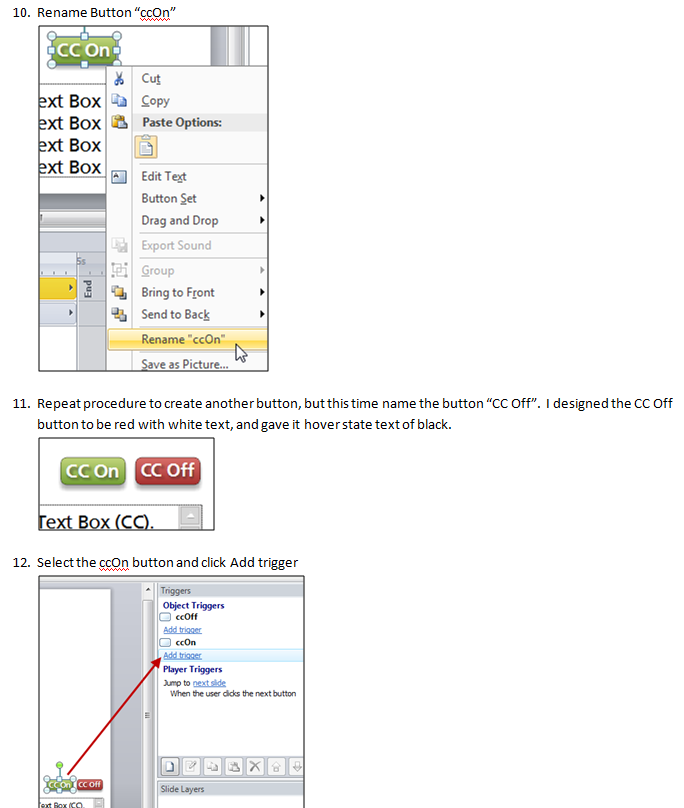
textbox. When using be sure to duplicate slide two for use for rest of project.
The first slide is different, has the above mentioned additional trigger to
default CC to off.
Again I like this option best because user can turn on, turn
off, it is defaulted off, doesn’t involve making two versions of slides or
layers, and if you have a lot of text you can still put the cc text into a
scrolling panel.
On first slide highlight and create a new state of Disabled for the textbox. Edit the Disabled state of textbox to display no text.

Slide 1:

Slide 2 to end of project: